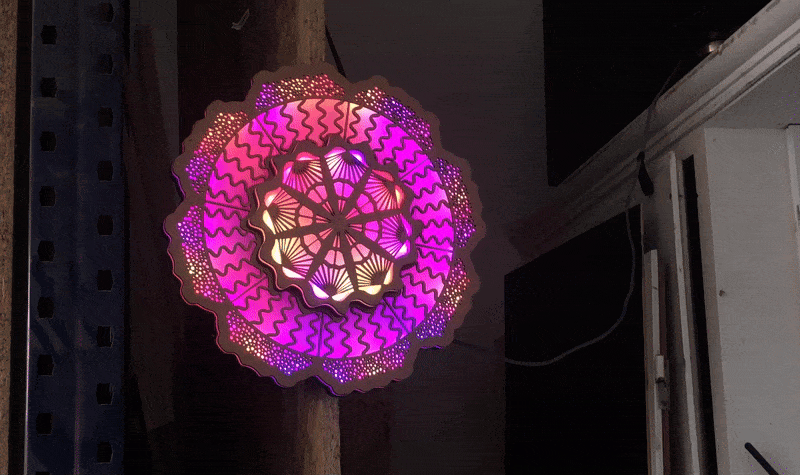
How to Build a Lamp That Dances to Music
You might’ve seen lamps like this at a festival. They react to music and aren’t sold anywhere. So you'll have to build one yourself. Sounds complicated? It’s not. I’ll show you how to do it.
Created as part of the Bachelor's thesis by Eduard Krasnov, 2025.
Let’s Get Ready
Shopping List
Here's what you’ll need to build the lamp. The components listed below cost about €66 in total.

(Same table structure as in the original German version, with all links preserved.)
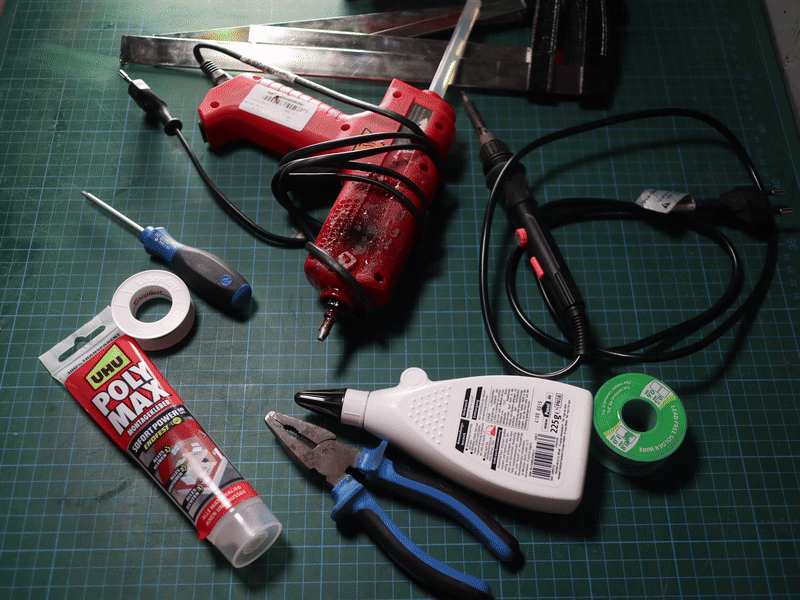
Tools
You'll also need a few tools—most of which you probably already have at home.
(Same tool table with links preserved.)
Files
Click here to download all the files. I’ll refer to this folder as the "Working Directory" throughout the guide.
Let’s Make the Lamp Dance
Step 1: Laser Cutting
Inside "Working Folder/Lasercutter" you’ll find the files for your laser cutter. The design fits within a 35x35cm area, and the thickest material used is 5mm—perfect for most hobby-grade laser cutters. Each file is named according to the material type and should be cut once. Check your laser cutter’s documentation for proper settings.

Step 2: Electronics
Here’s the wiring layout:
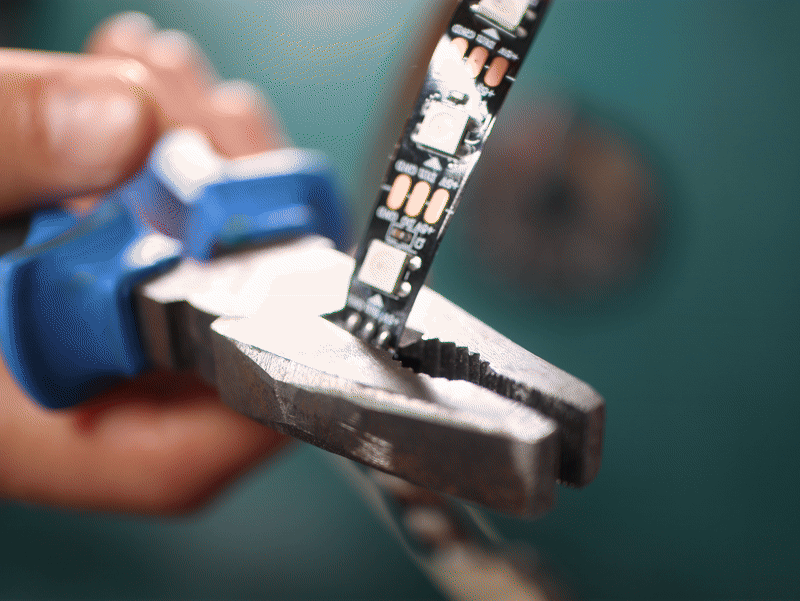
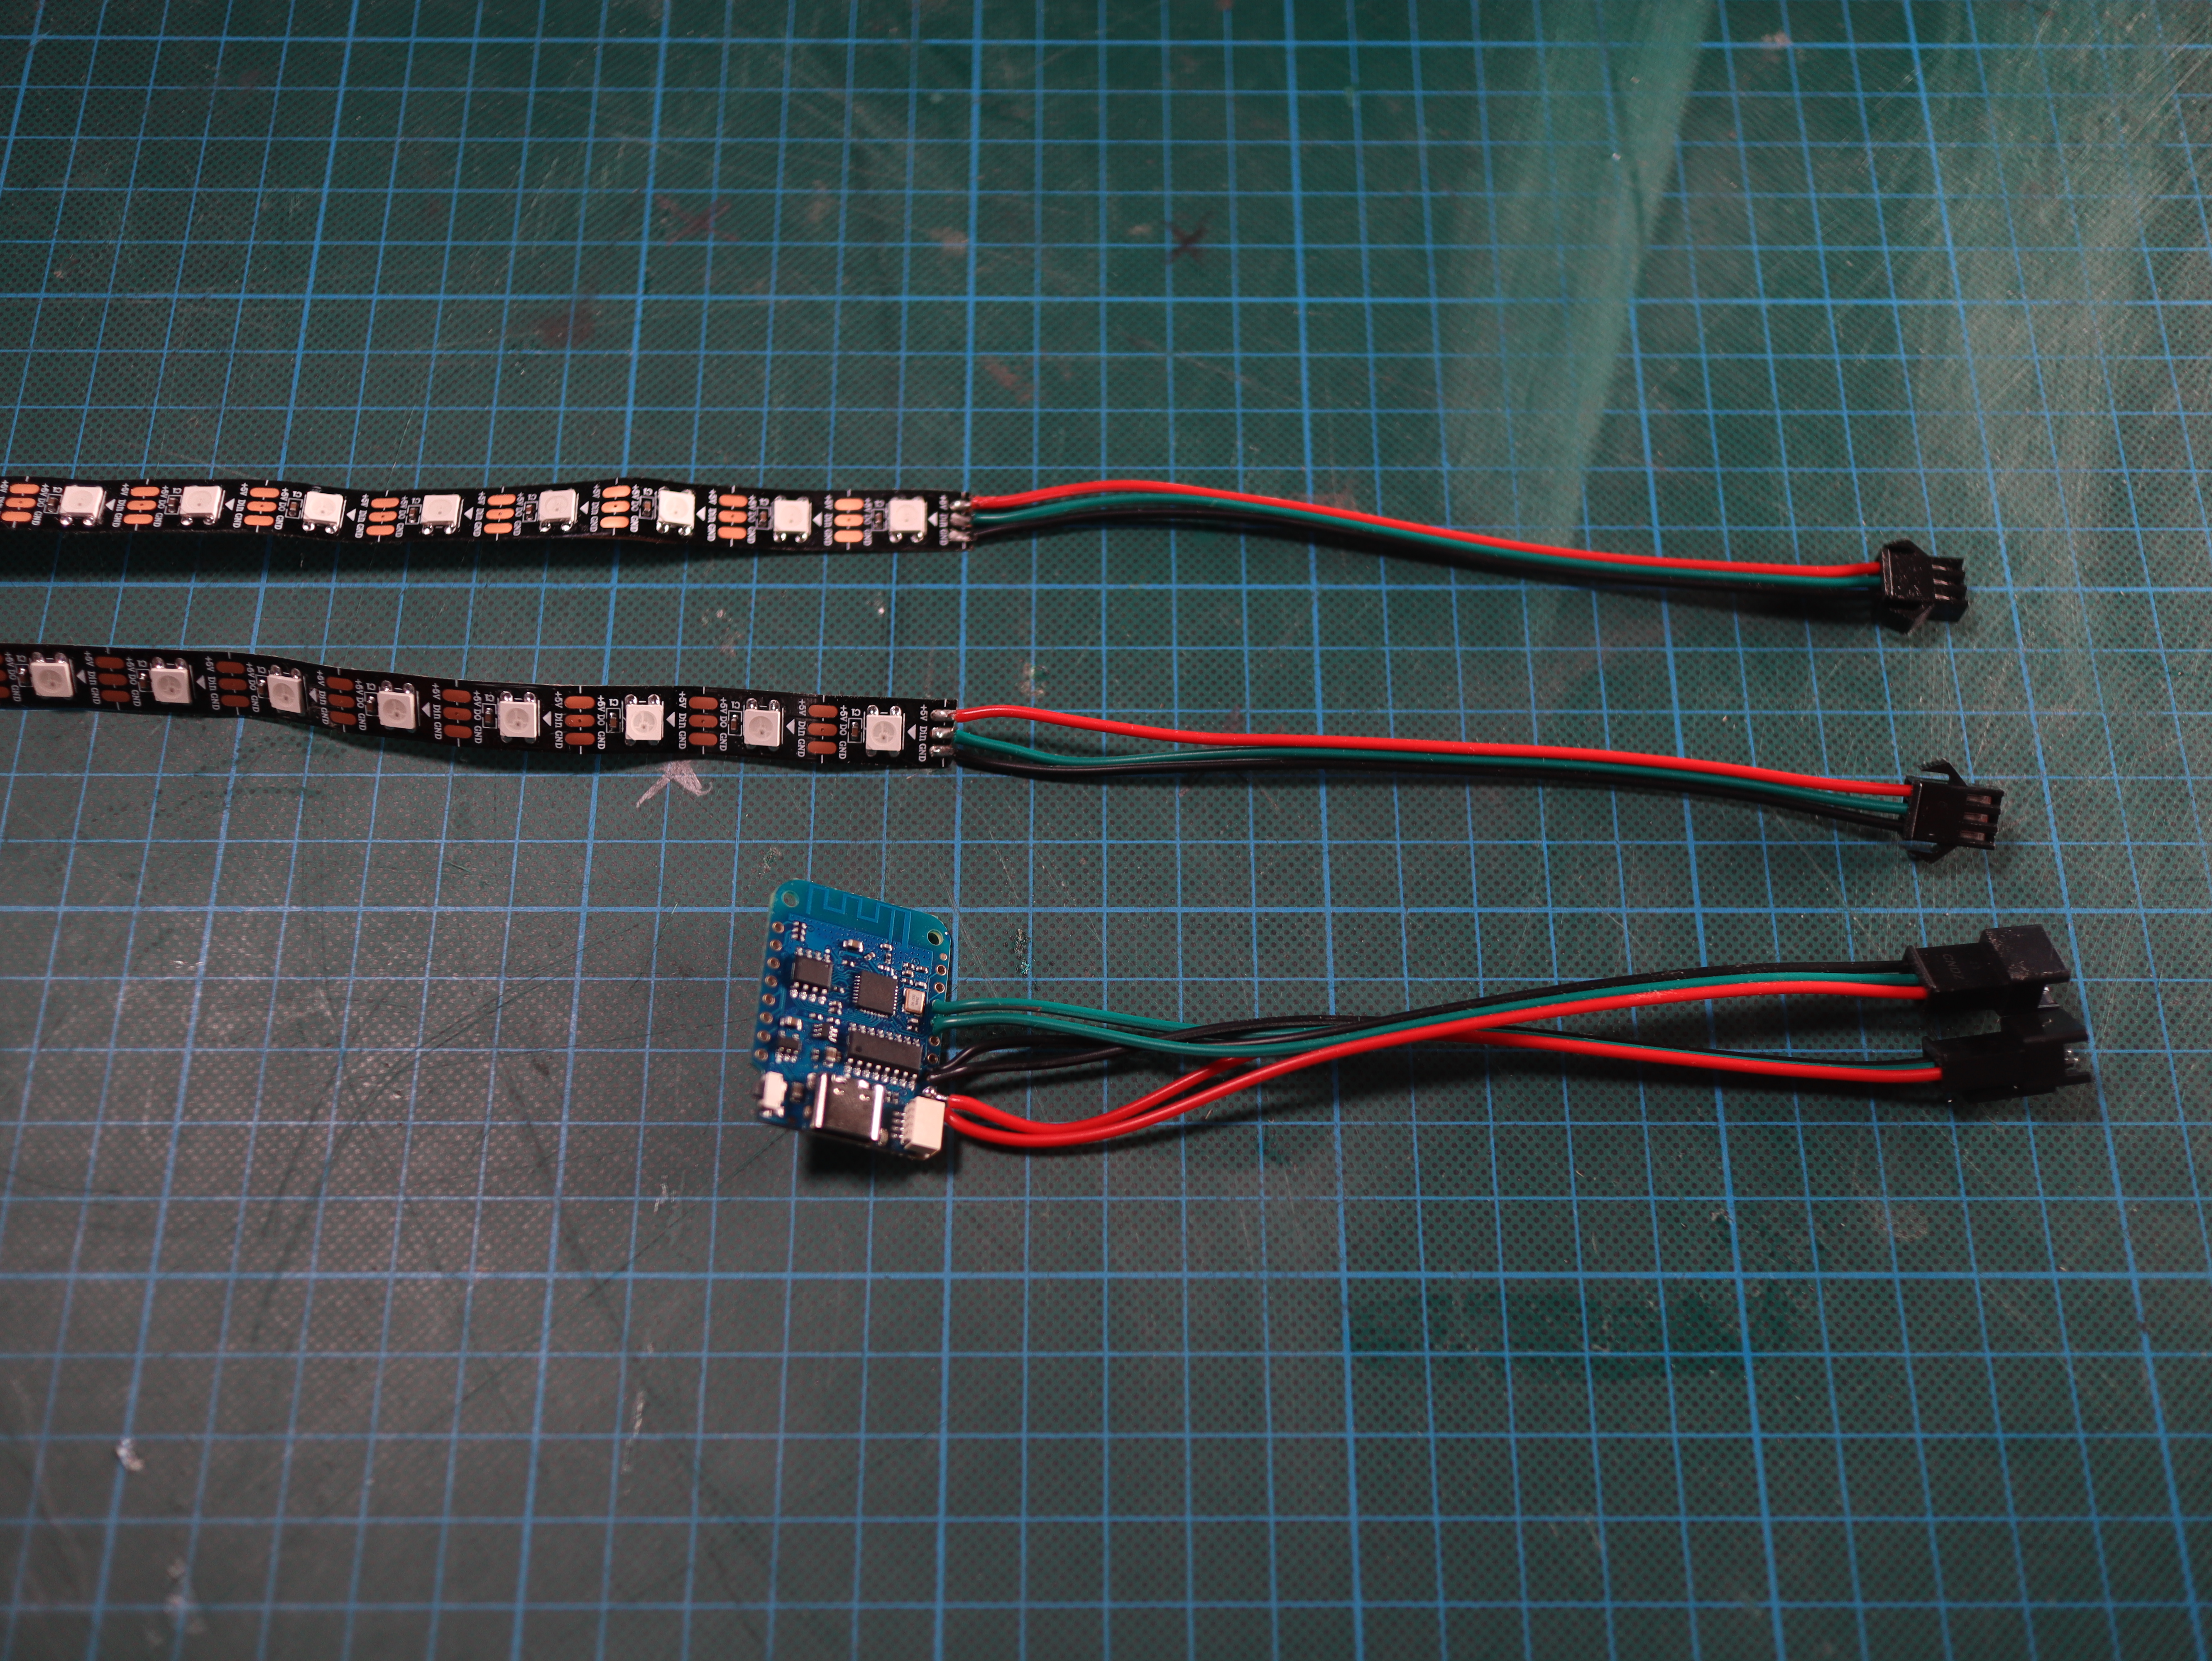
Let’s get to soldering:
- Cut two LED strips (29 and 60 LEDs)
- Solder female JST connectors to both LED strips
- NOTE: The arrows on the LED strip must point away from the connector
- Solder male JST connectors to the ESP
- One data wire to pin D4 and one to pin D5
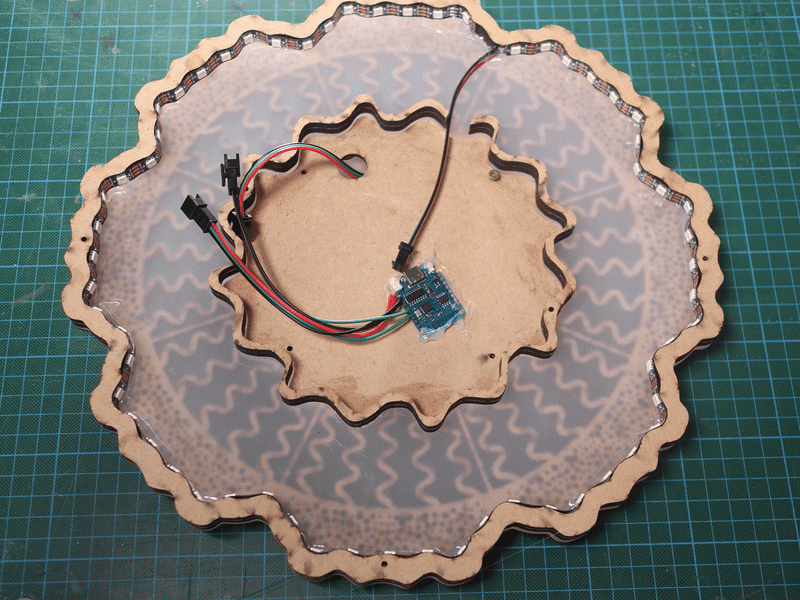
Here's the finished soldered electronics:
Step 3: Assembly
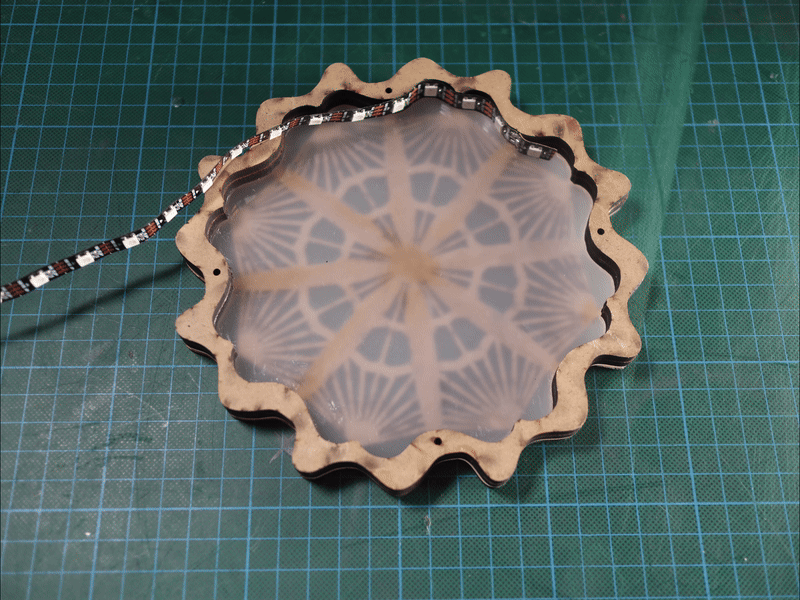
Layer by layer—and soon you'll have a working lamp. You’ll notice there's a small and a large star. Most steps apply to both.
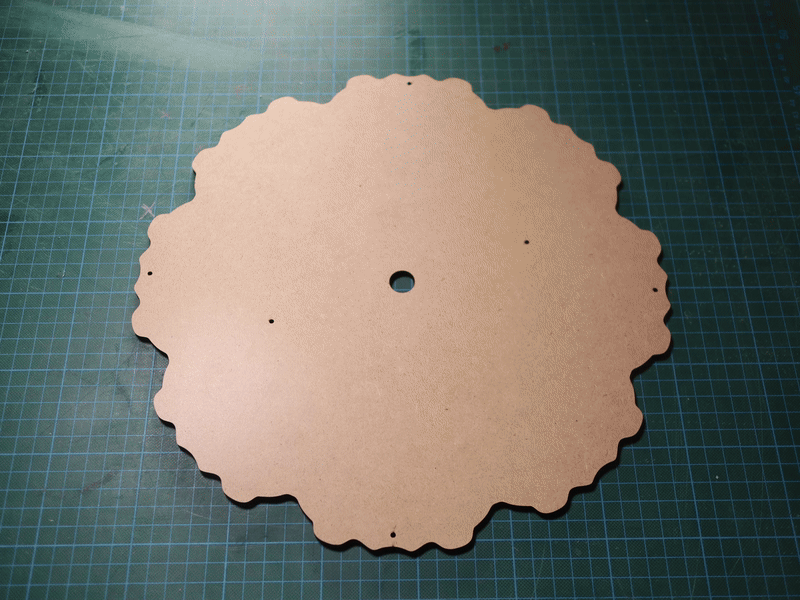
- Glue the housing together. NOTE: There are screw holes—make sure they align properly.
- Use mounting glue to attach the MDF pattern to the acrylic sheet. NOTE: Don’t forget to peel off the protective film.

- Glue the two wooden walls together
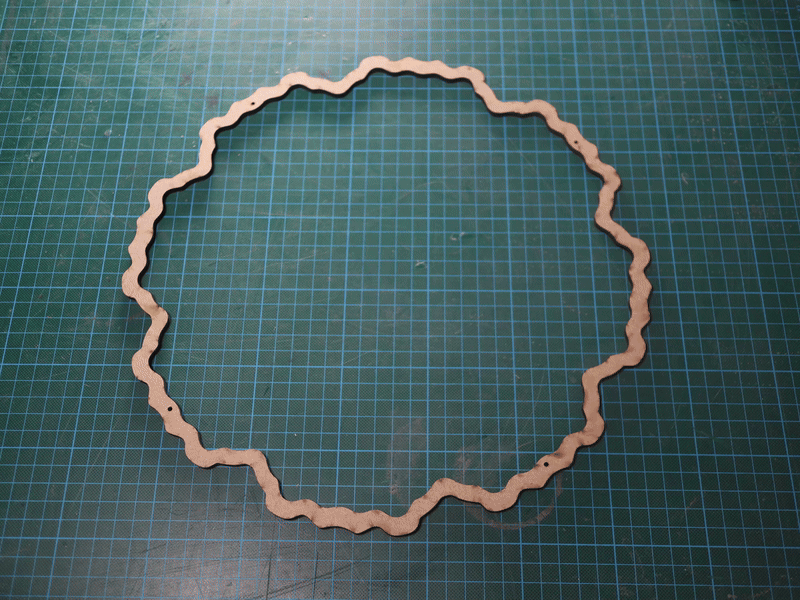
- Attach the glued wooden structure to the acrylic with mounting glue
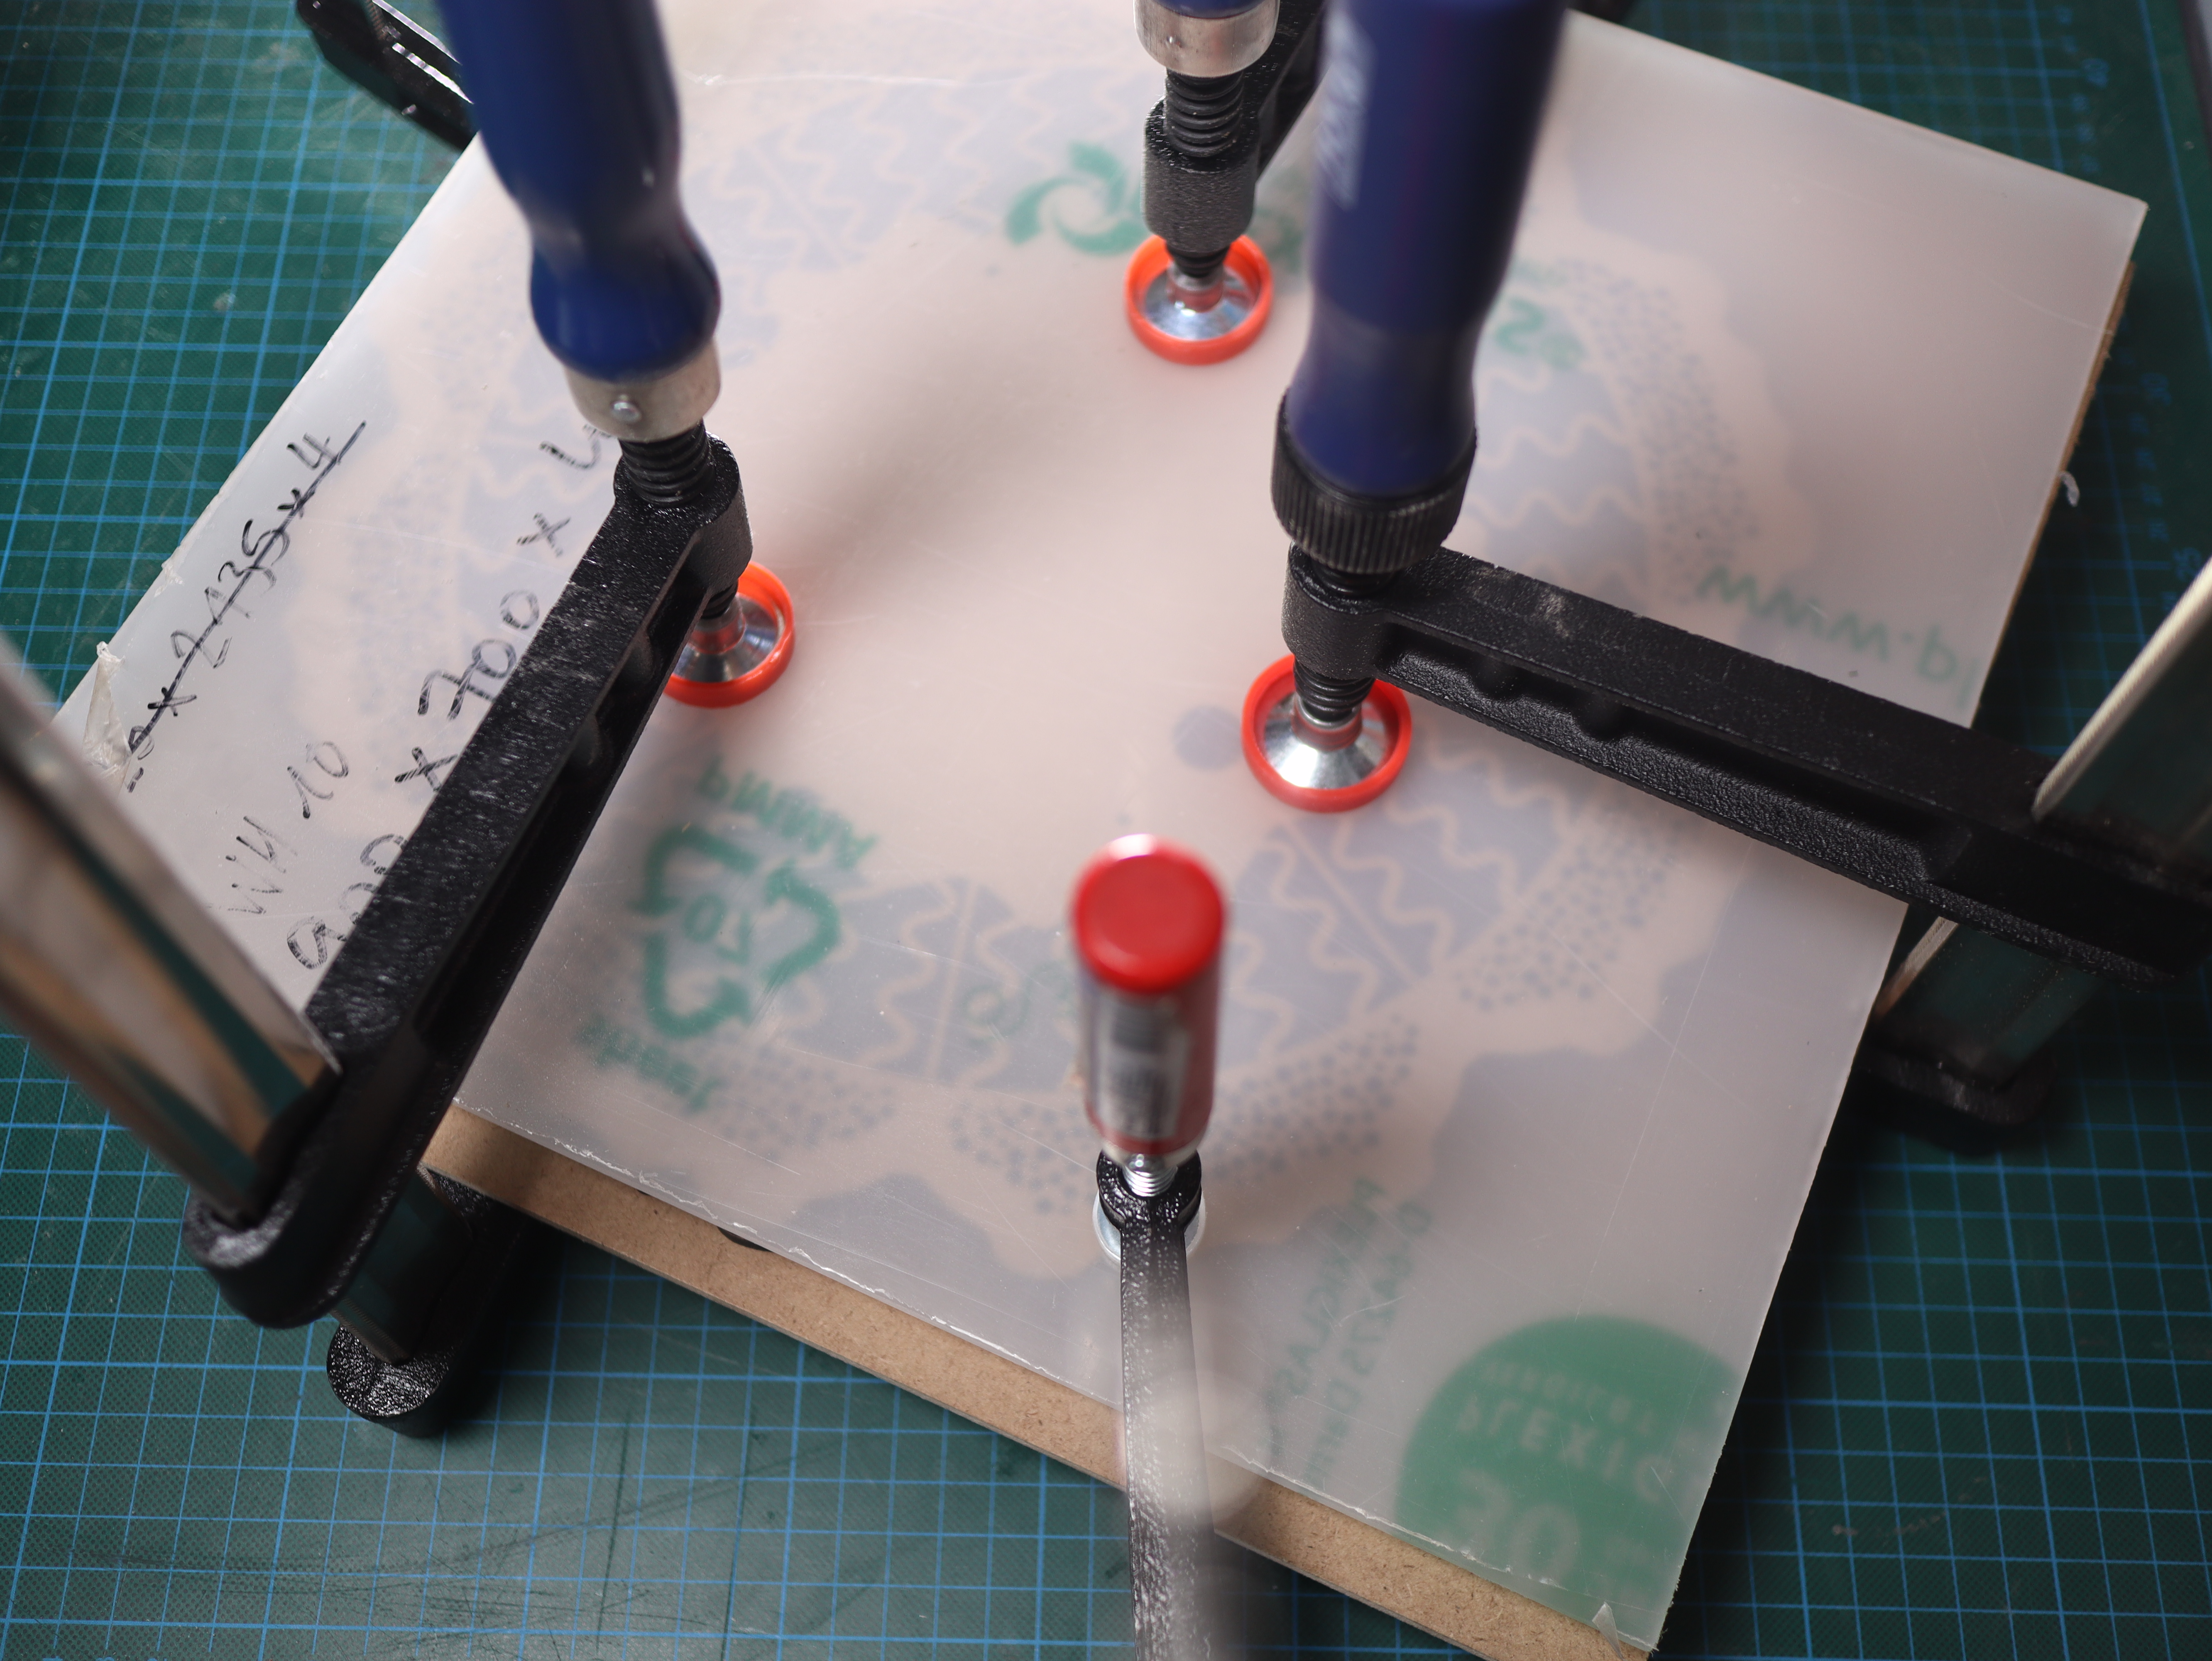
- Clamp everything together while it dries
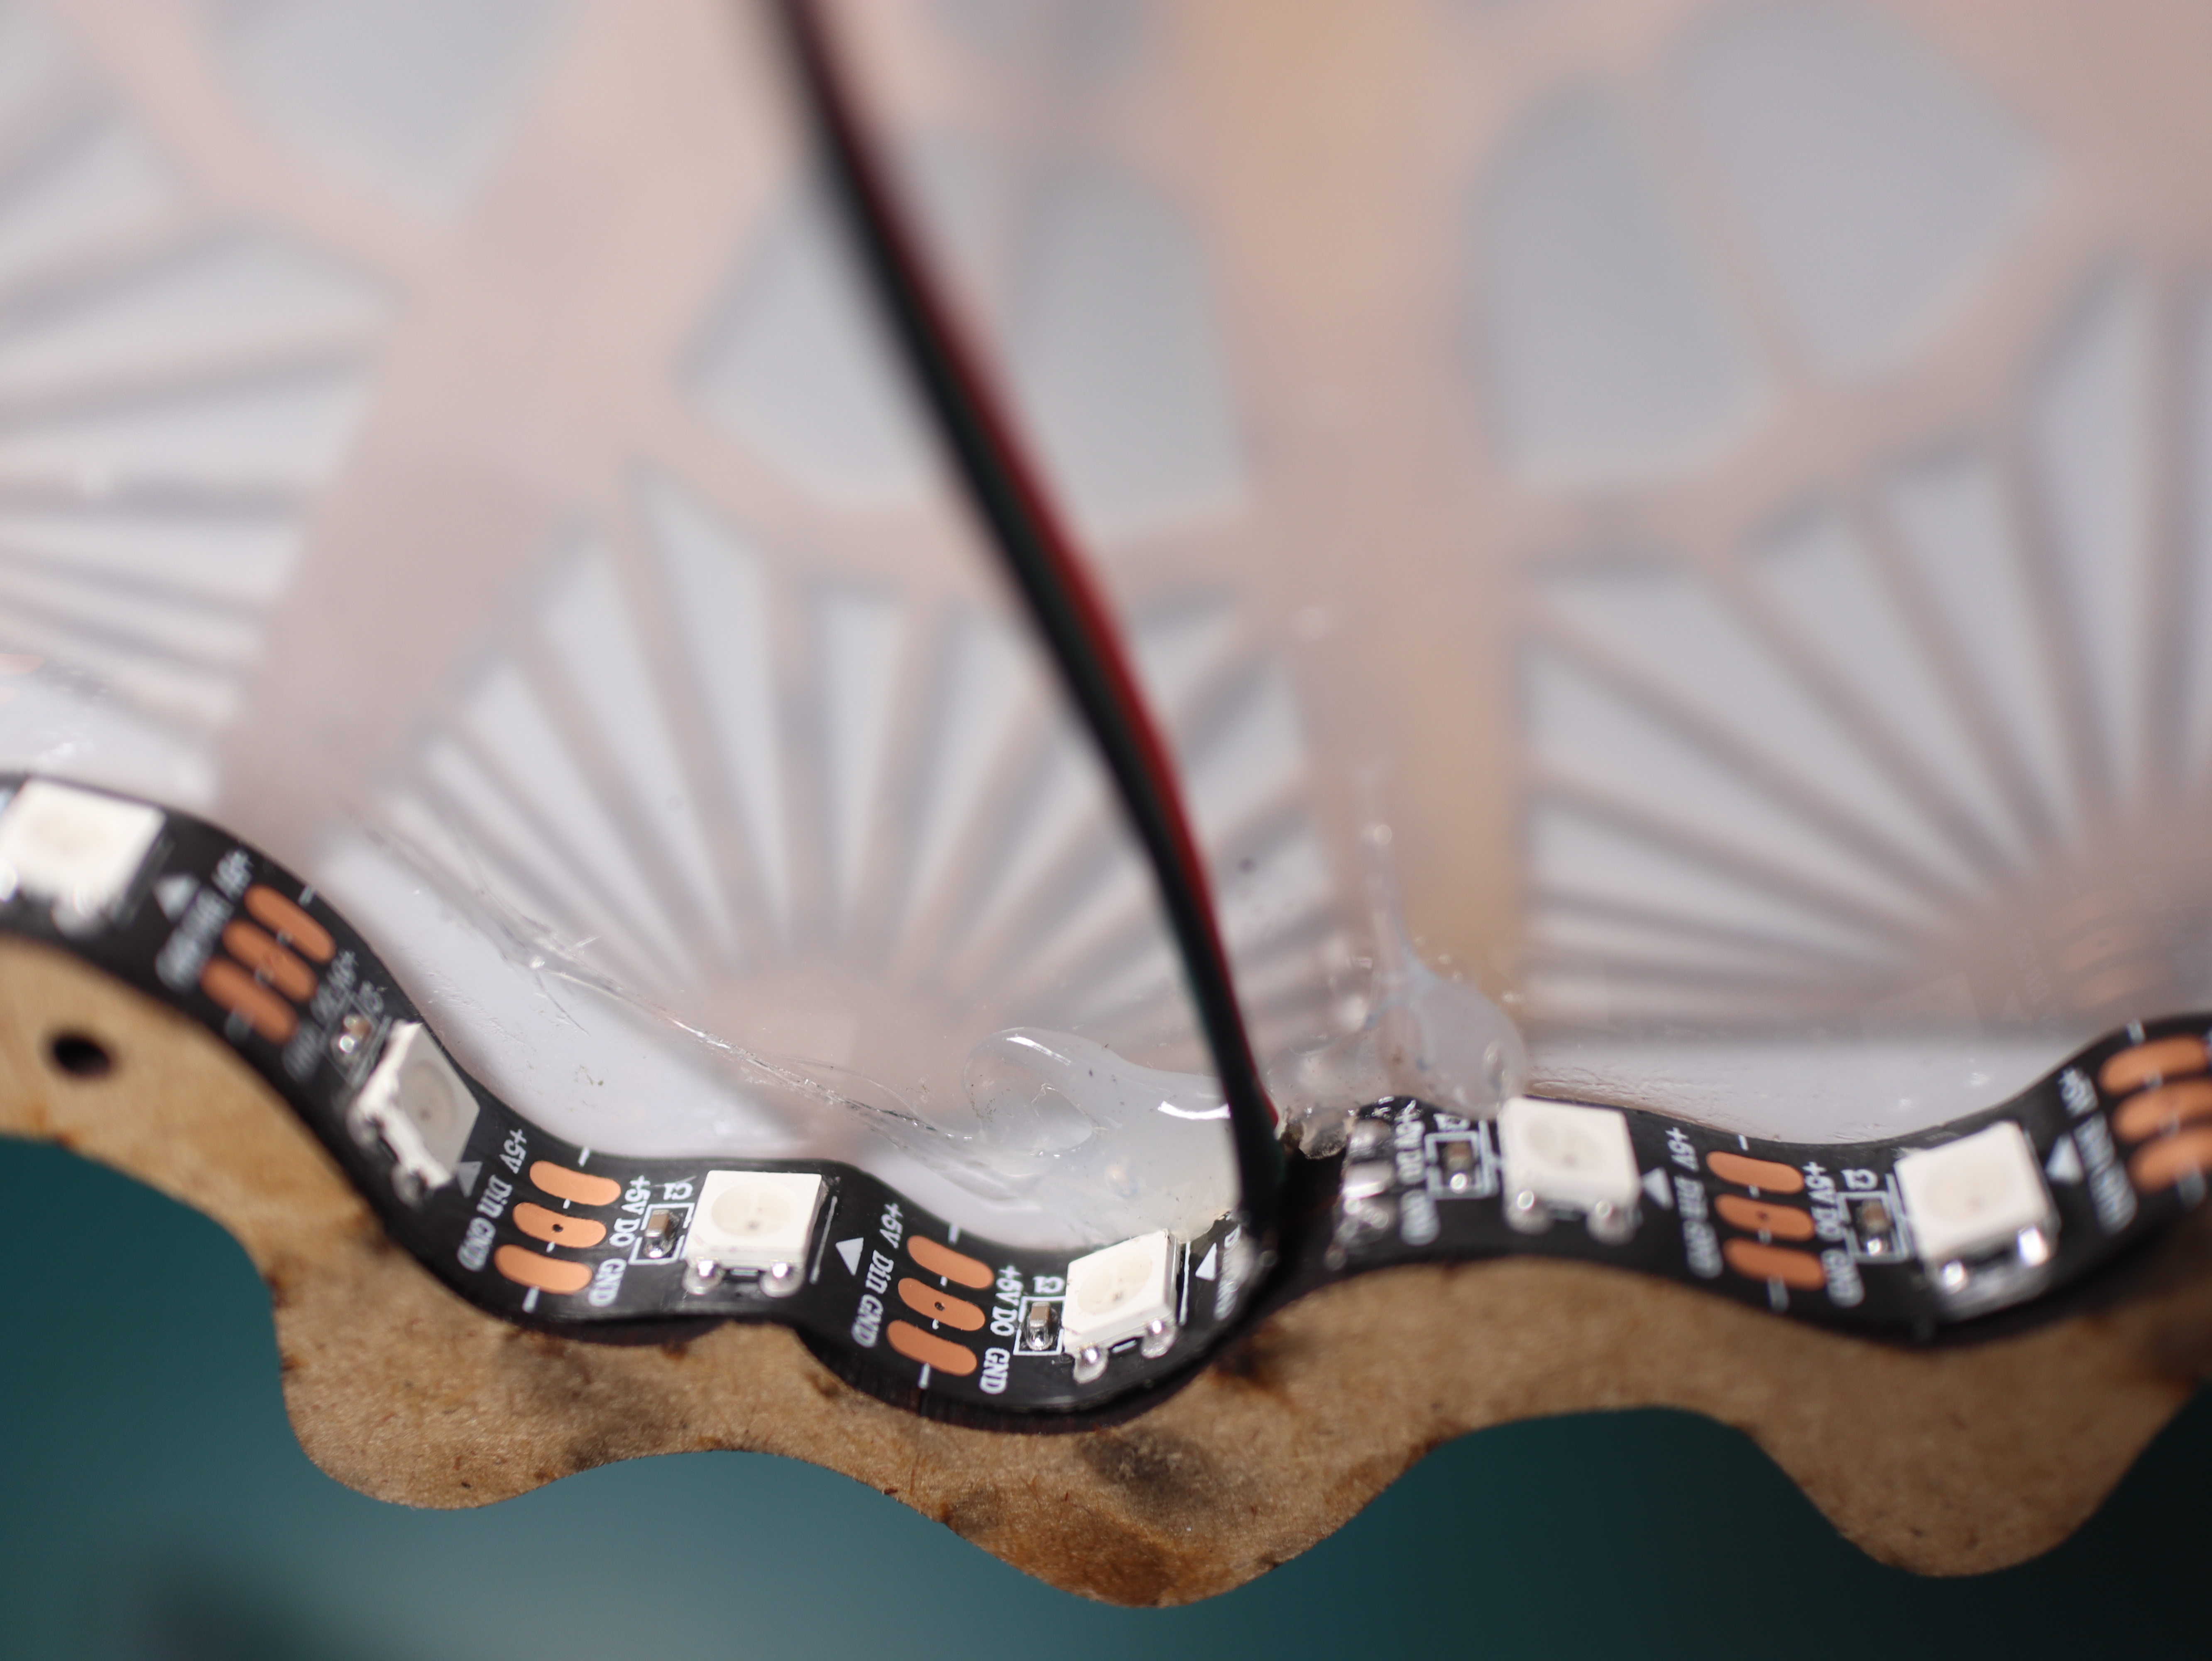
- Place the LEDs
- Peel off the adhesive backing
- Stick the LED strips to the inner walls of the housing
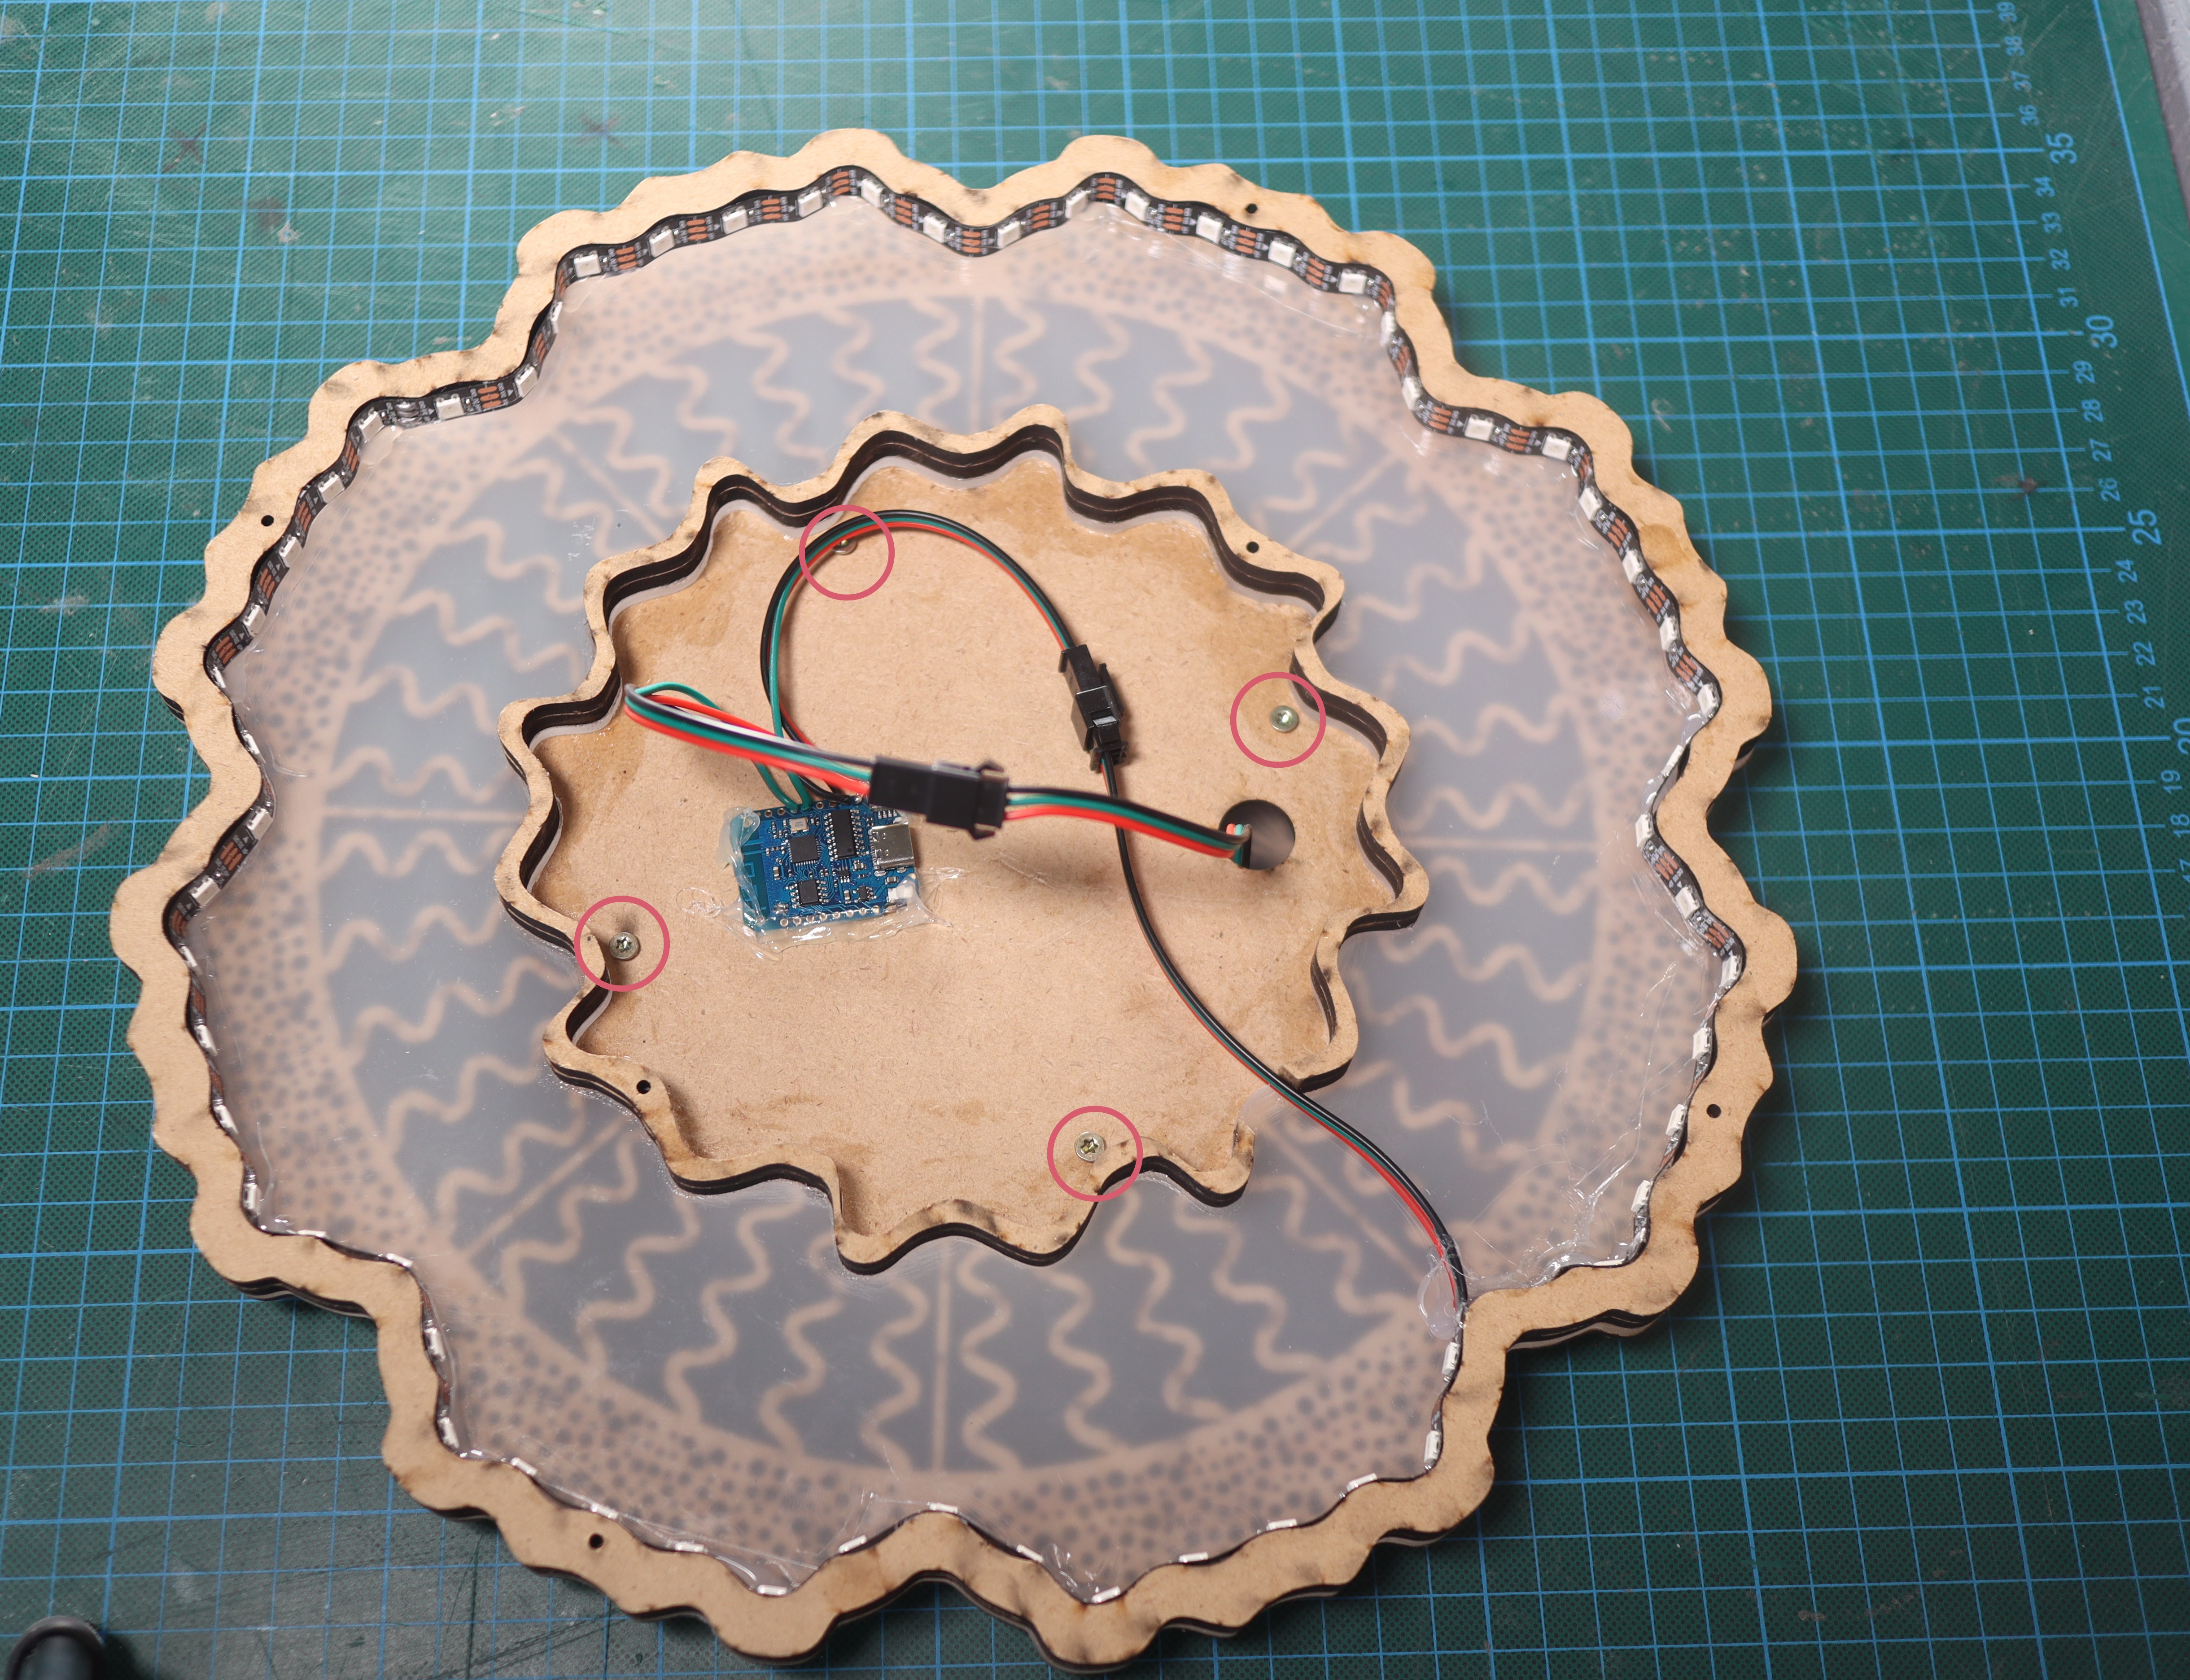
- Use hot glue to mount the ESP to the ceiling of the large star

- Optionally, secure the LED strips further with hot glue
- Screw the small star to the large one
- Feed the connector cable through the hole
- Align the screw holes
- Use four screws to fasten them
- Close the housing
- Insert the USB-C cable through the hole in the base
- Connect it to the ESP
- Use six screws to secure the base
Step 4: Software
- Install WLED on your ESP and connect it to Wi-Fi
- Plug in the ESP via USB
- Go to the WLED Web Installer and follow the steps
- Enter your Wi-Fi credentials when prompted
- Click “Visit Device” and leave the page open
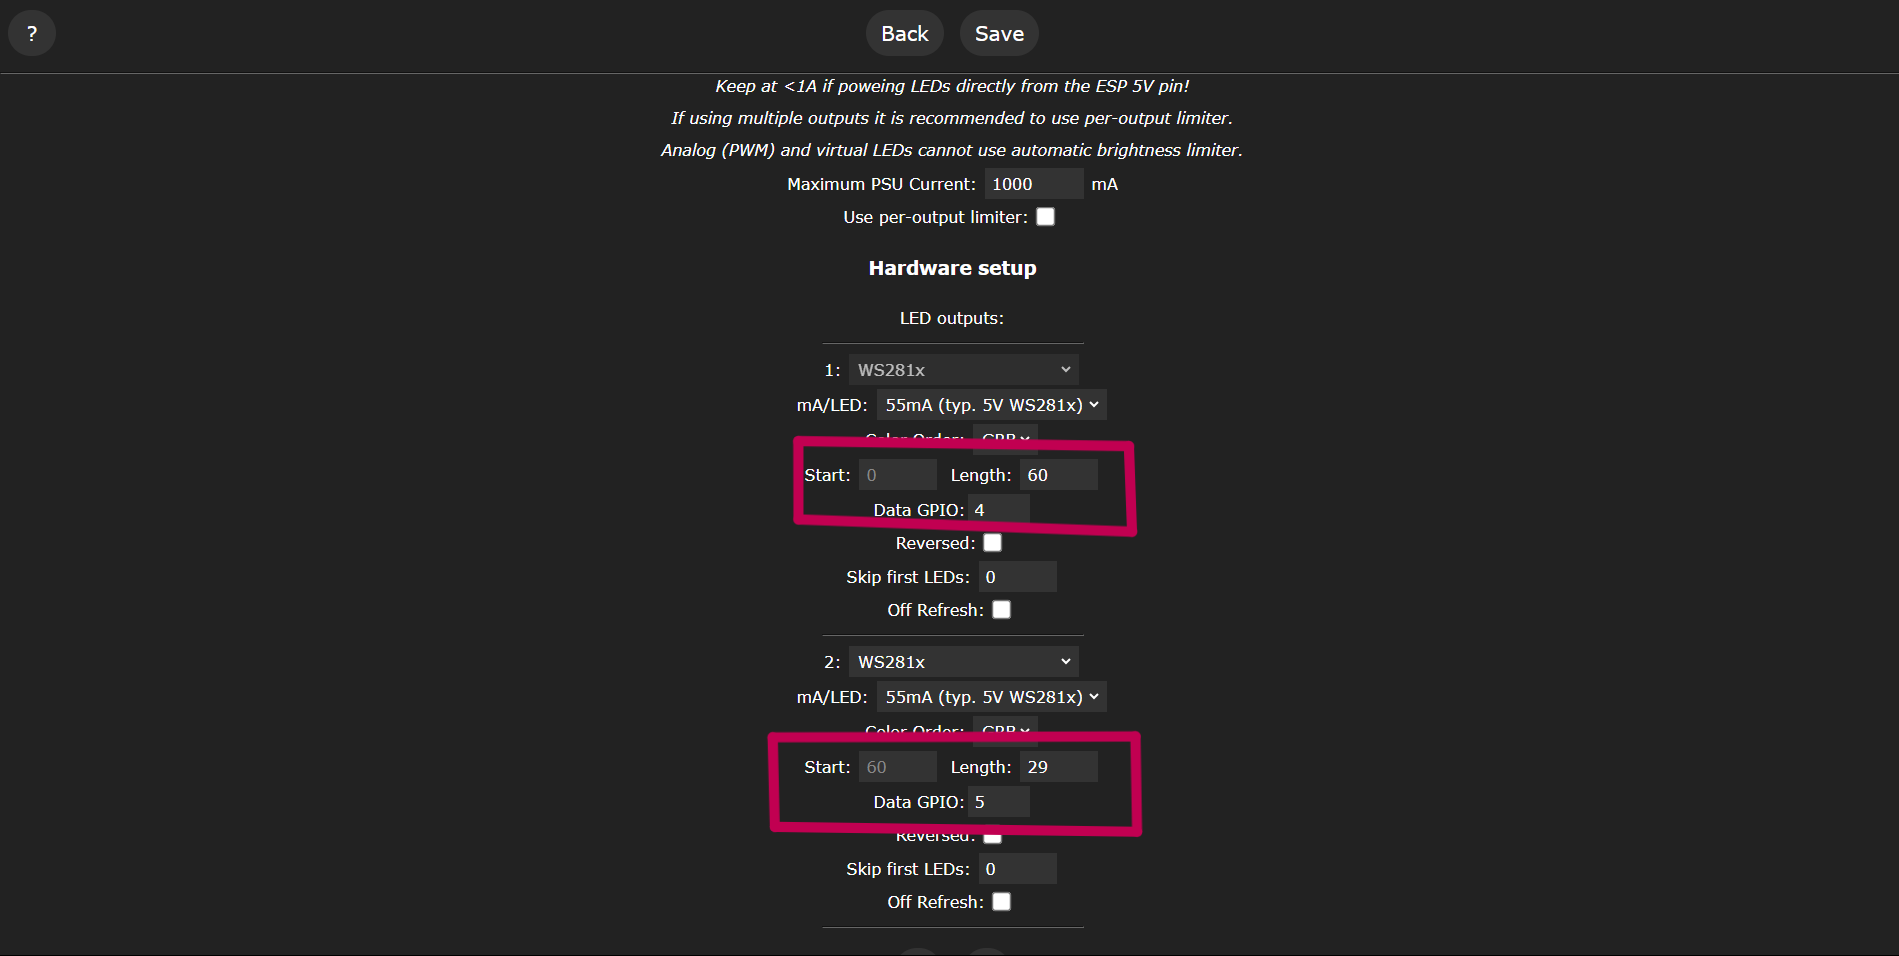
- Configure WLED
- Go to Config → LED Preferences → Hardware setup
- Set values as shown below:
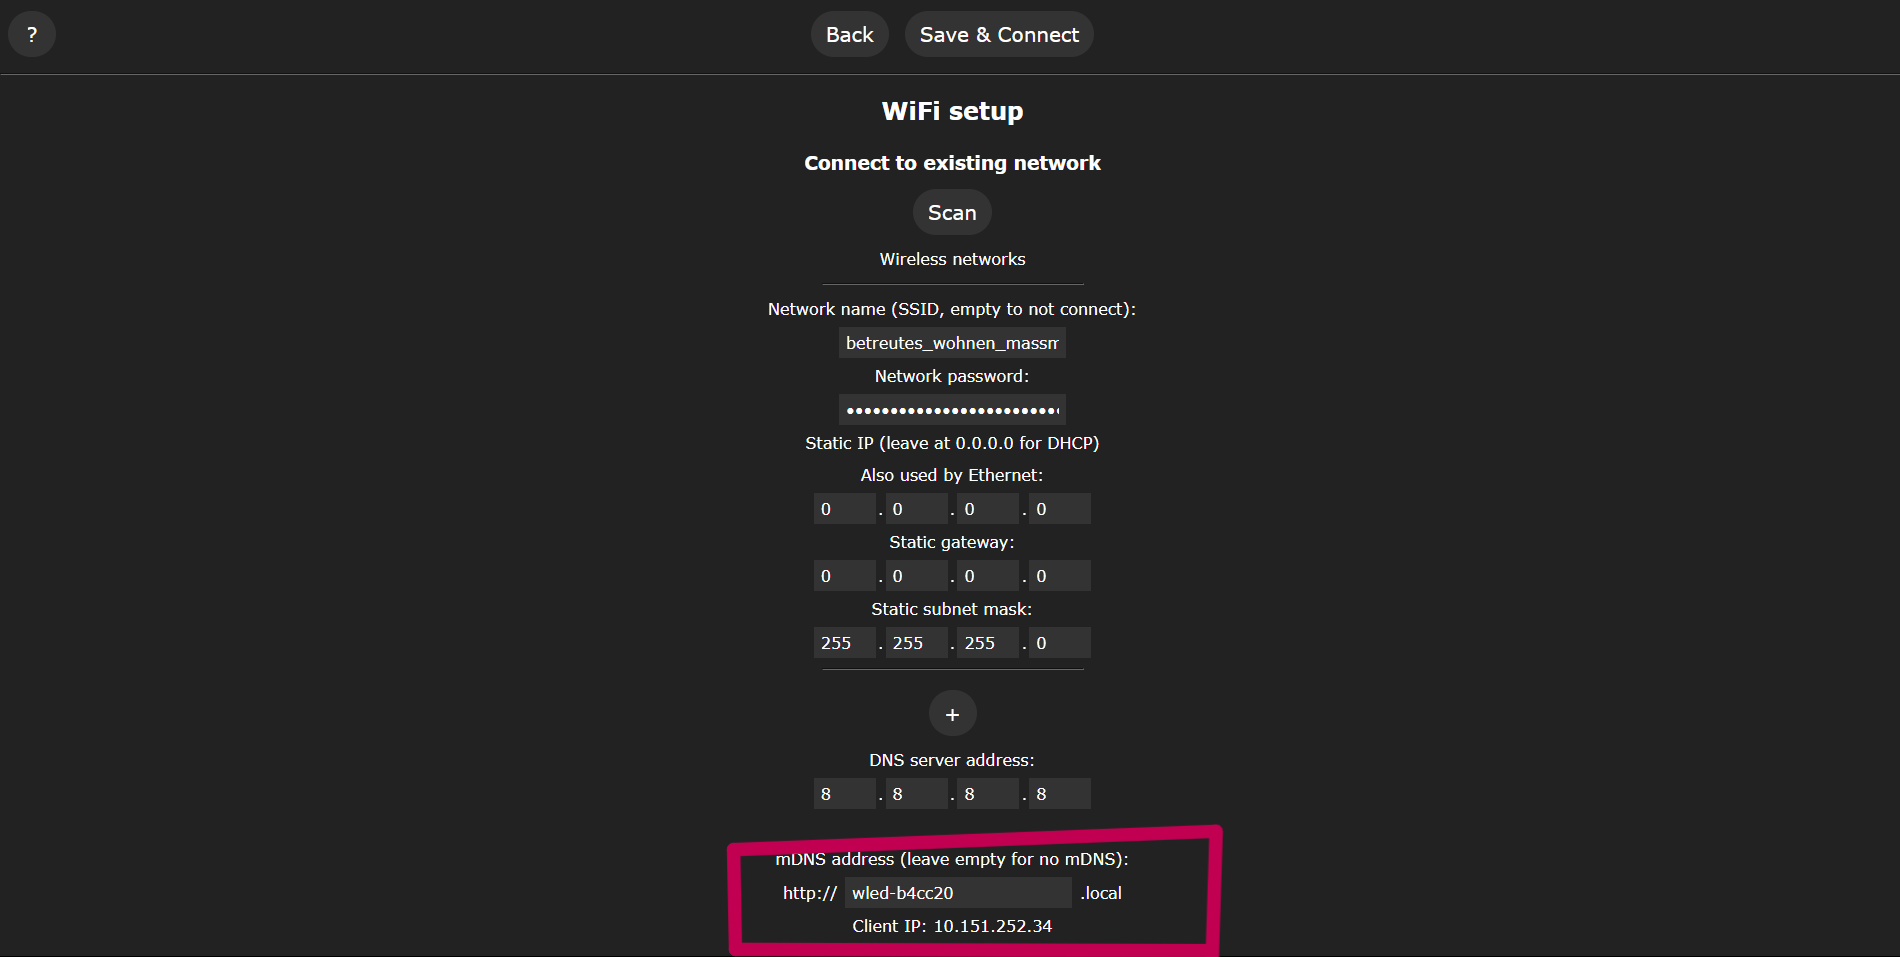
- Note down the IP address of your ESP:
- Install and configure TouchDesigner
- Open “workingDirectory/tanzendeLampe.toe”
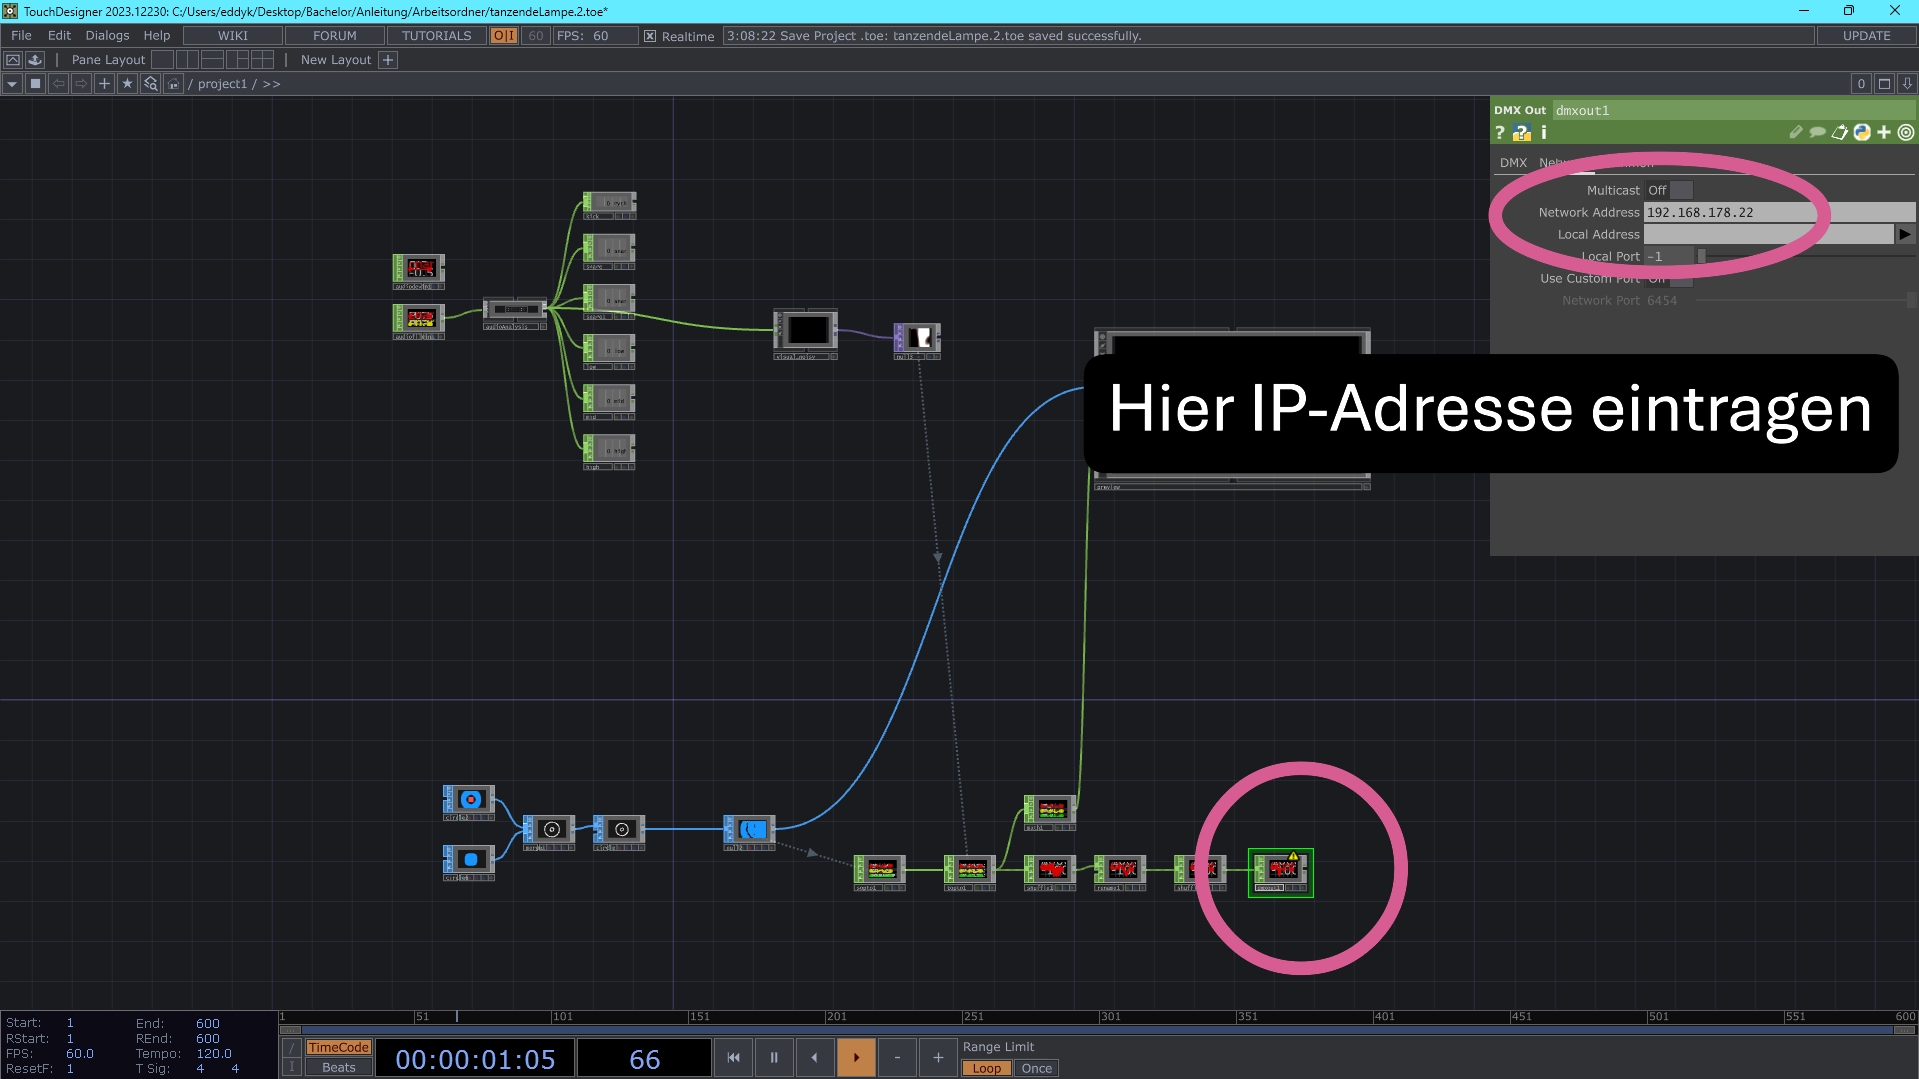
- In the DMXOut operator, set the “Network Address” to the ESP’s IP
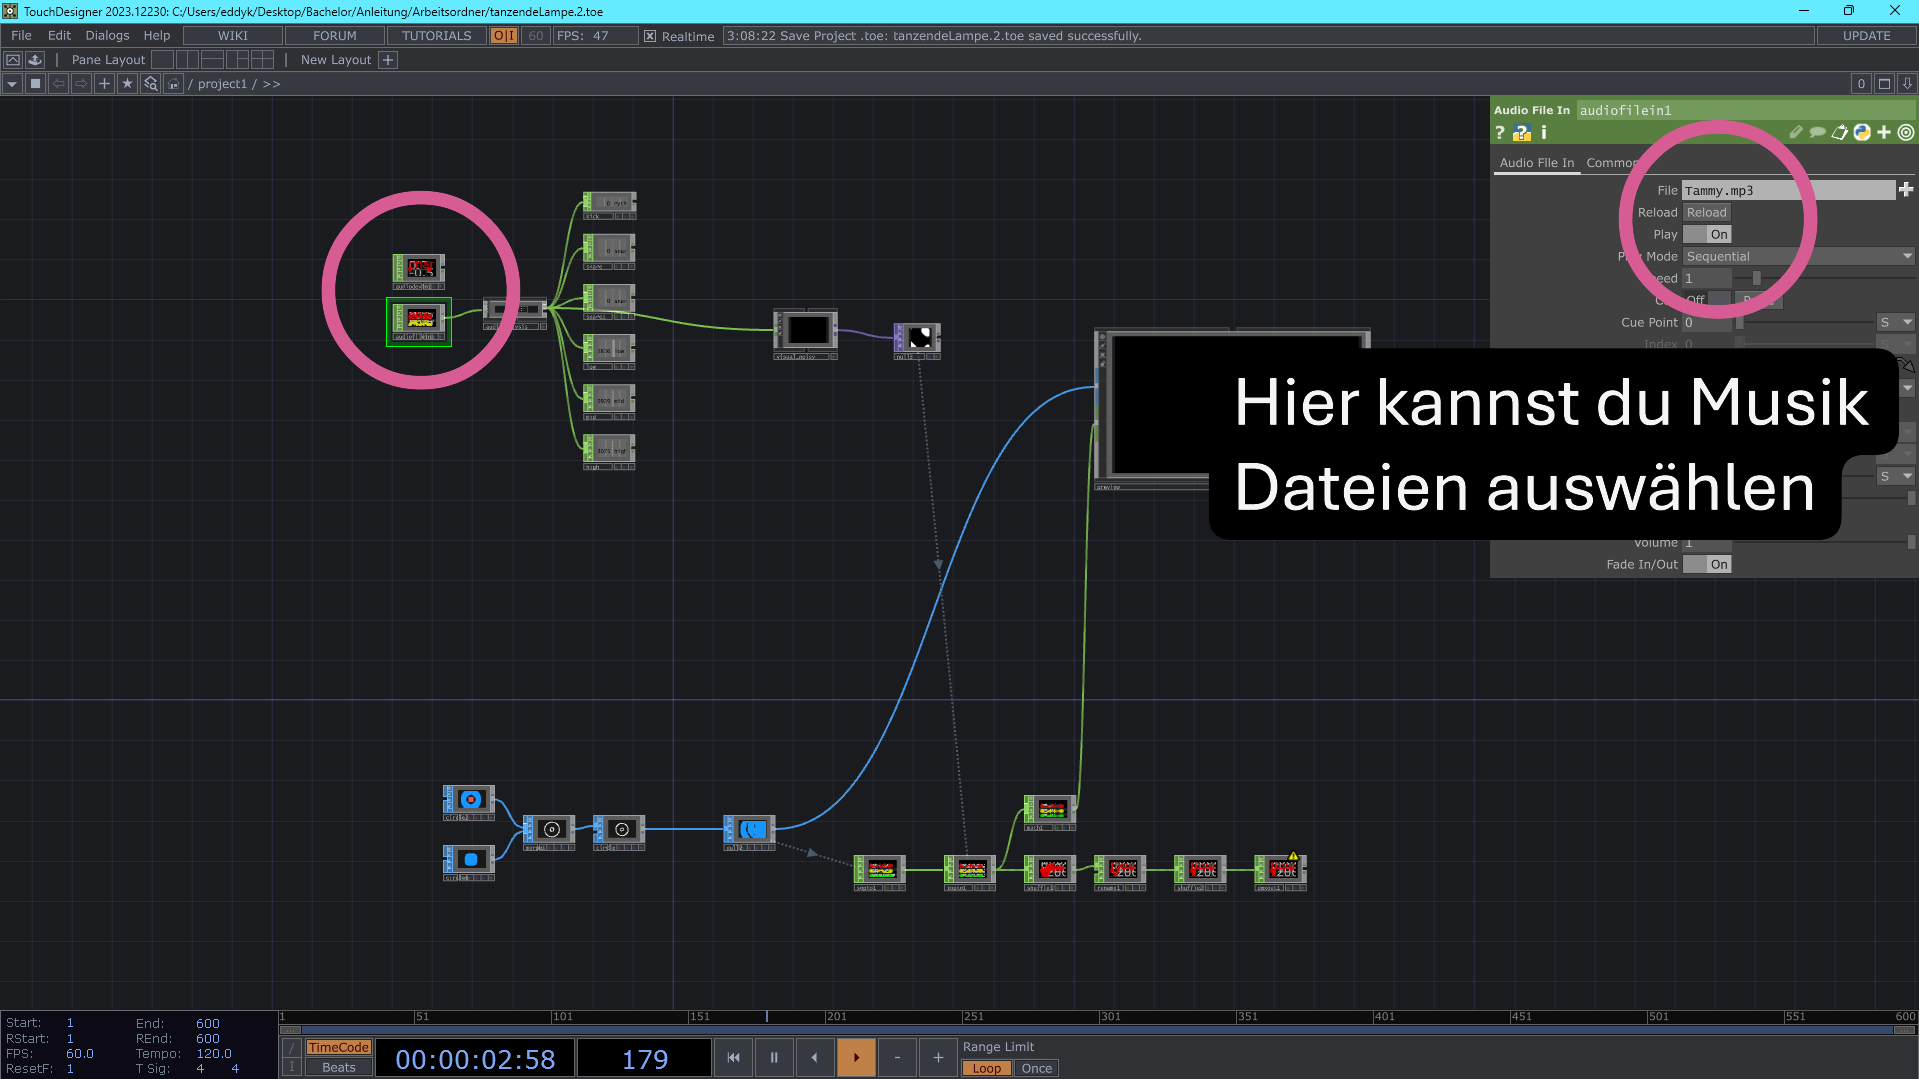
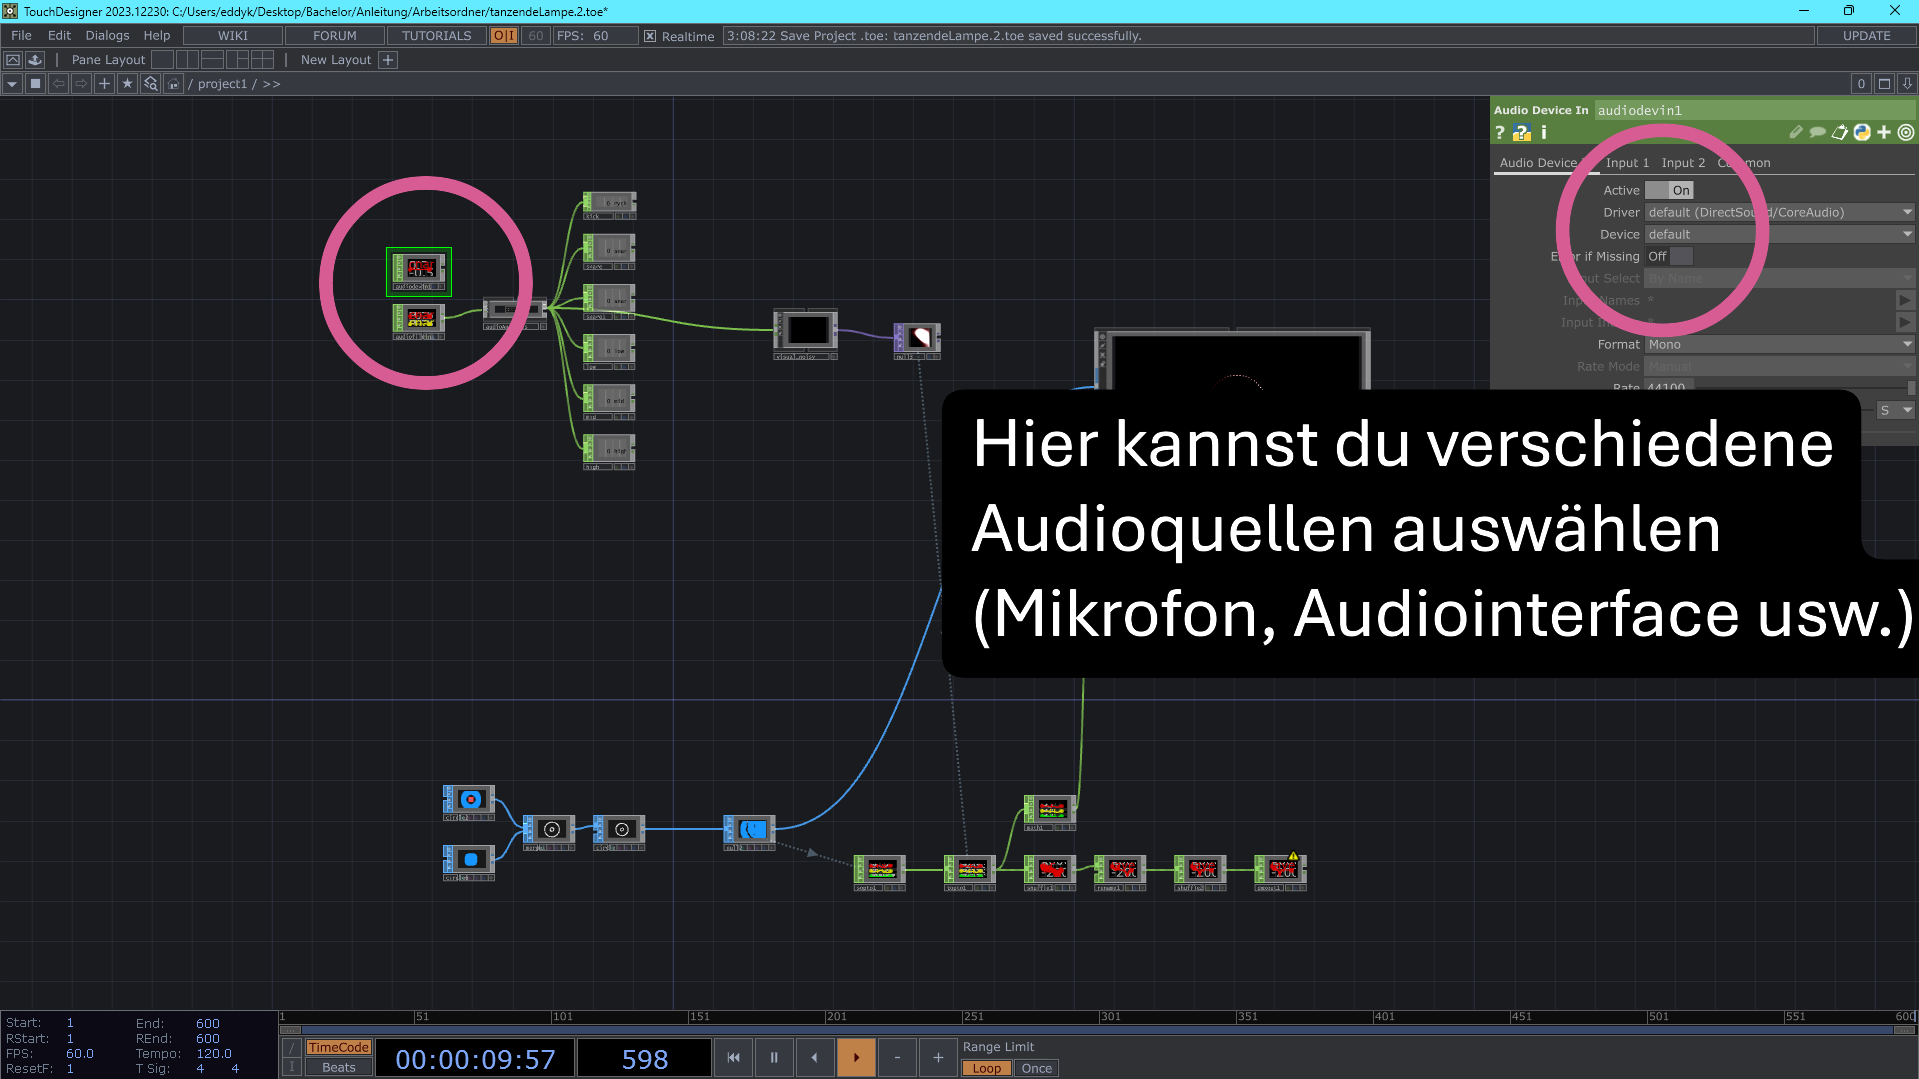
- Set up your audio input
- A music file from the Working Folder is preloaded:
- You can also use a microphone or audio interface:
Ideas for Tinkerers
The great thing about this lamp is that you can adapt it however you like. Here are some ideas:
- Add a microphone and use Sound-Reactive-WLED to make it standalone and dance to ambient sound
- Create a waterproof version using multiplex wood and a protective coating like Warnex
- Use MadMapper instead of TouchDesigner for visual control
Created as part of the Bachelor's thesis by Eduard Krasnov, 2025.